


User Guide
Everything you need to know about managing your Year-Make-Model fitment data, importing records, customizing the widget, and maintaining your store.
1. Understanding the Database Structure
The APA YMME app stores your vehicle fitment data in a structured database with three key columns. Each column has a specific data type that controls how shoppers interact with it on your storefront.
| Data Column | Type | Description |
|---|---|---|
| Year | range | Accepts a year range (e.g. 2018–2023). The widget displays this as a range picker. |
| Make | select | A dropdown selector populated automatically from your data. |
| Model | select | A dependent dropdown that updates based on the selected Make. |
You can also add new custom fields by clicking the "Add new field" button in the Database Structure panel. This lets you extend the search with additional filters like Submodel, Engine, or Trim.
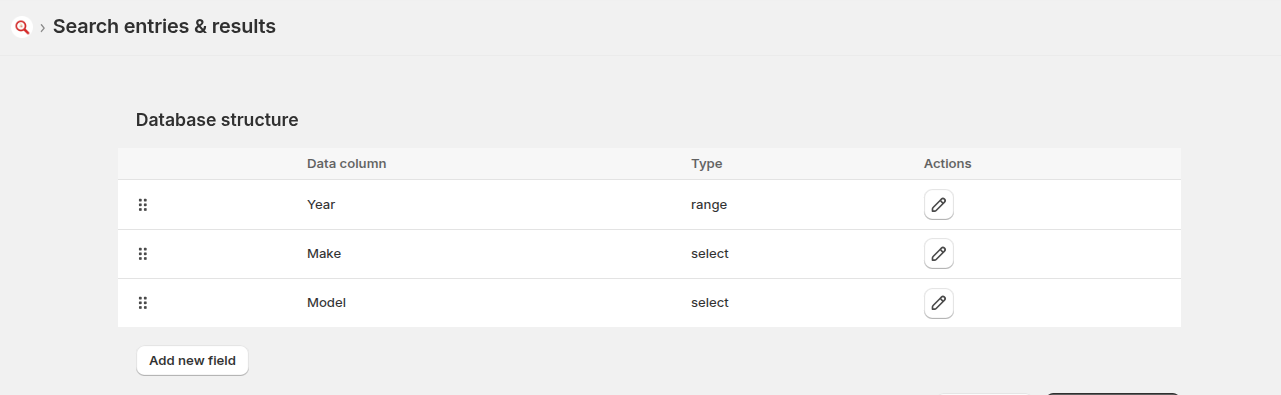
Database Structure panel showing Year, Make, and Model columns with their types.
2. Managing Search Entries (YMM Data)
The Search entries & results page is your central dashboard for viewing, searching, filtering, and managing all YMM fitment records.
- Use the Search bar at the top to quickly find entries by year, make, or model.
- Click Filters for additional filtering options.
- Each row displays the Year range, Make, Model, and the number of Attached products.
- Click the three-dot menu (⋮) on any row to edit or delete an entry.
- Select multiple rows using checkboxes and click "Delete Selected" for bulk removal.
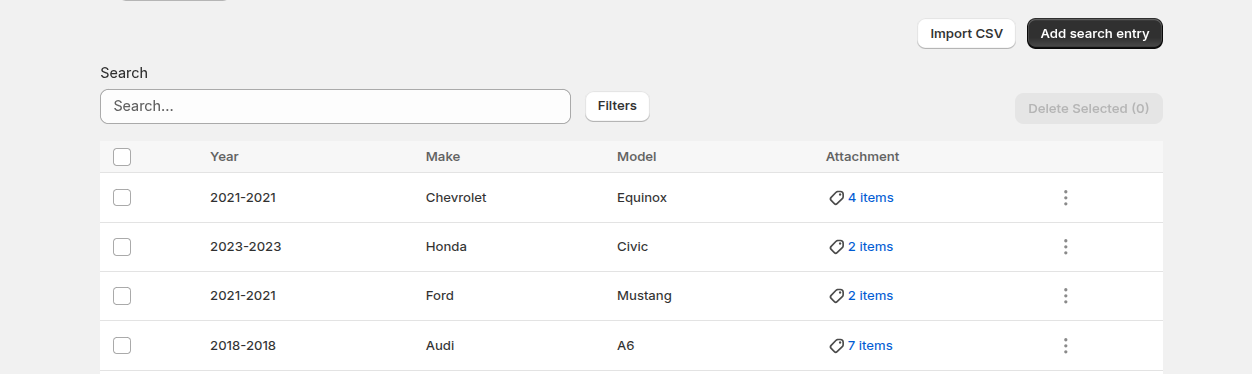
YMM data table with search, filter, and bulk actions.
3. Adding a Search Entry Manually
To add individual fitment rules one at a time, click the "Add search entry" button on the Search entries page.
- Click the "Add search entry" button in the top right corner.
- The Search form preview will appear showing fields for Year From, Year To, Make, and Model.
- Fill in the year range and vehicle details for the fitment rule.
- Click "Add Products" to search and attach the specific products that fit this vehicle combination.
- The attached products will appear below with their image and title. You can remove any product by clicking the trash icon (🗑).
- When you're ready, click Save in the top-right corner.
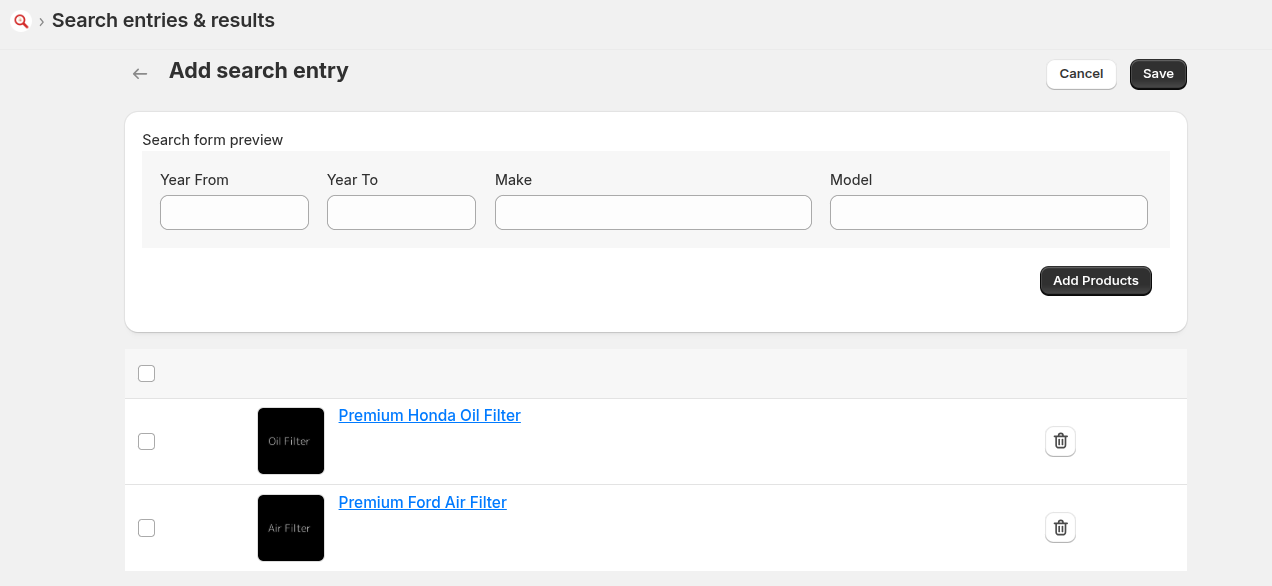
Add search entry form with Year From/To, Make, Model fields and attached products.
4. Bulk Importing YMM Data via CSV
For large catalogs with hundreds or thousands of fitment entries, you can import all your data in one shot using a CSV file.
- From the Search entries page, click the "Import CSV" button.
- Click "Download Sample CSV" to get the correct format template.
- Populate the CSV file with your fitment data.
- Drag & drop your completed CSV file into the upload area.
- Click "Upload & Import" to start the import process.
- Wait for the import to finish and review any errors in the report.
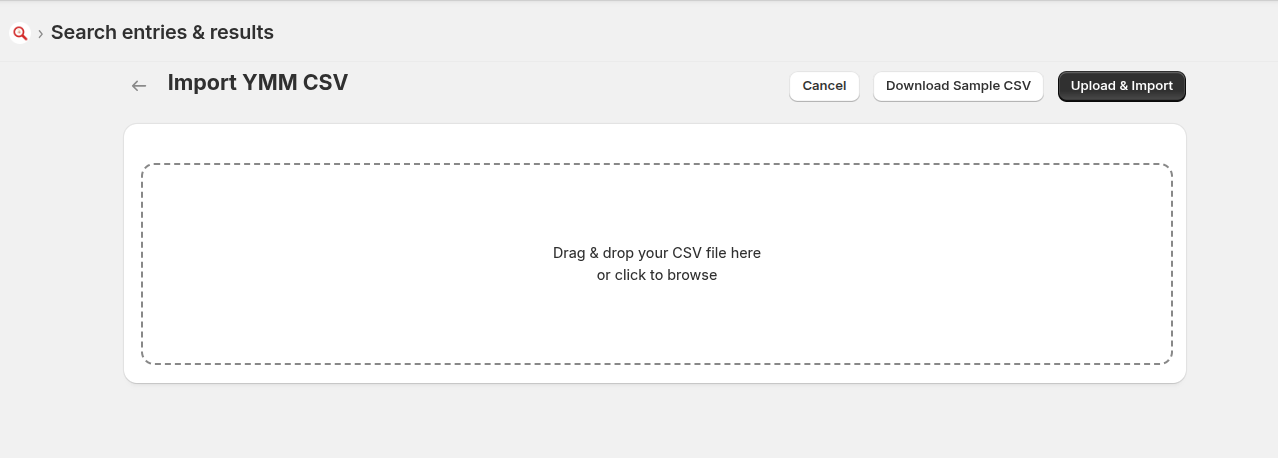
CSV Import screen with drag-and-drop upload zone.
5. Customizing the Widget Appearance
You can match the YMM search widget's colors, fonts, and layout to your store's brand directly from the Shopify Theme Editor — no code required.
- Navigate to your Shopify Dashboard → Online Store → Themes → Customize.
- Locate the APA YMM Widget block in your header or homepage layout.
- Click on the widget block to open its settings panel.
- Use the color pickers to adjust the Background Color, Button Color, and Text Color.
- Adjust settings like Field Title display or Border Radius.
- Click Save inside the Theme Editor to publish.
6. Uninstall Prep & Data Cleanup
⚠ Preparing to uninstall?
When you uninstall the YMM App, Shopify instantly revokes our access to your store. This means we are permanently blocked from automatically removing the YMM search tags we injected into your products.
To keep your Shopify admin clean, please use the "Purge All YMM Tags" button before you delete the app from your store. This removes all YMM-related tags from your product data.
How to Clean Up Tags
- Navigate to the app's Uninstall Prep & Data Cleanup page.
- The Cleanup Status section shows the total number of YMM tags.
- Click the red "Purge All YMM Tags" button.
- Wait for the cleanup process to finish. The count should reach 0.
- Only then is it safe to uninstall the app.
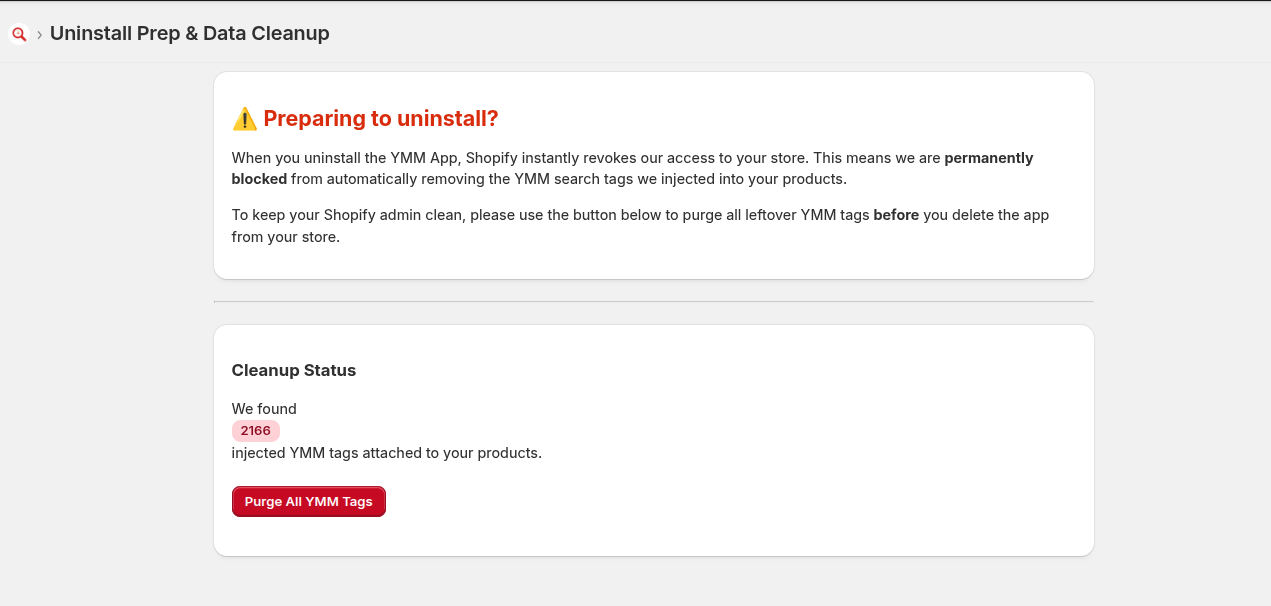
The Cleanup page showing the tag count and Purge button. Always run this before uninstalling.

