


Installation Guide
Follow these simple steps to integrate the APA YMME & Parts Search widget and Fitment Table into your Shopify store.
1. YMM Widget Installation
Option A: Default Automated Setup (Recommended)
- From your Shopify Admin, go to Apps → APA YMME & Parts Search → Setup.
- Click on the YMM Widget configuration card.
- Select the Default Setup button.
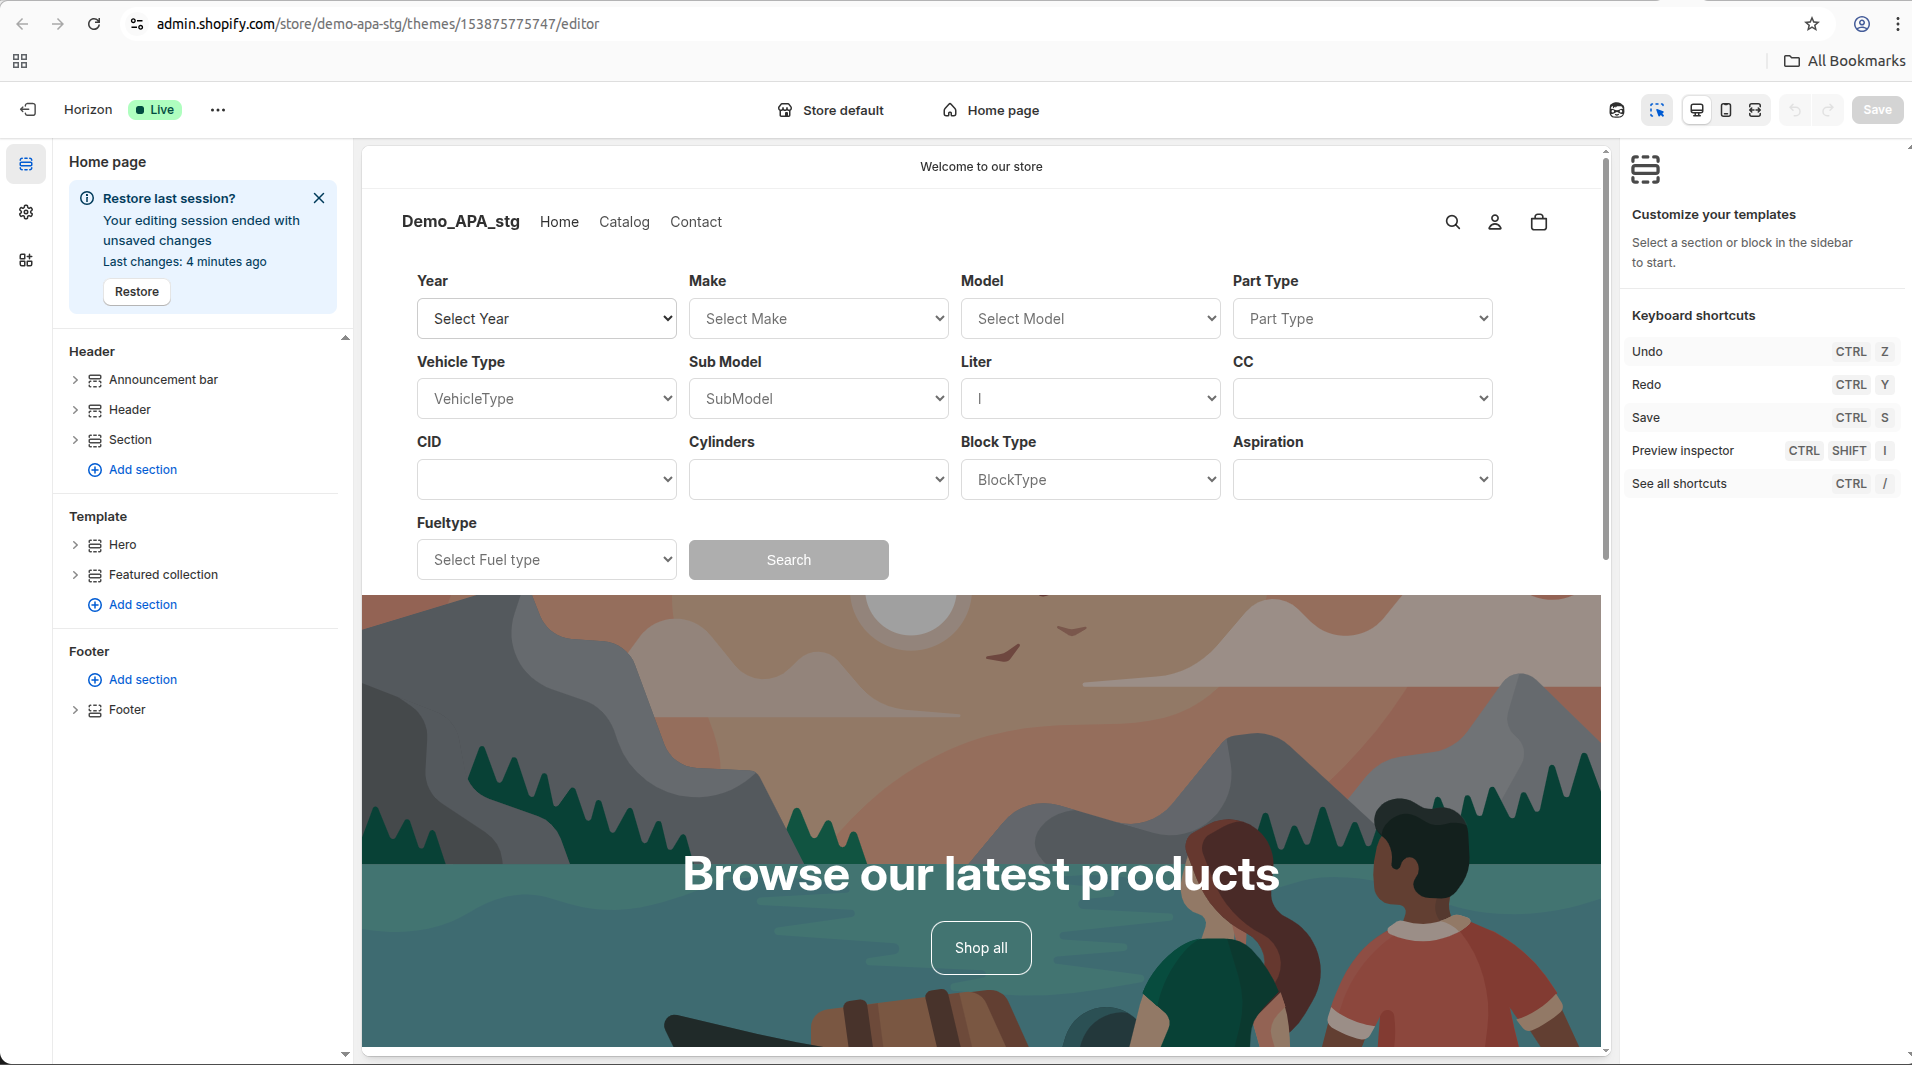
- Your Shopify Theme Editor will open automatically with the App Block pre-injected into the Header section.
- Review the placement, and click Save in the top right corner of the Theme Editor.
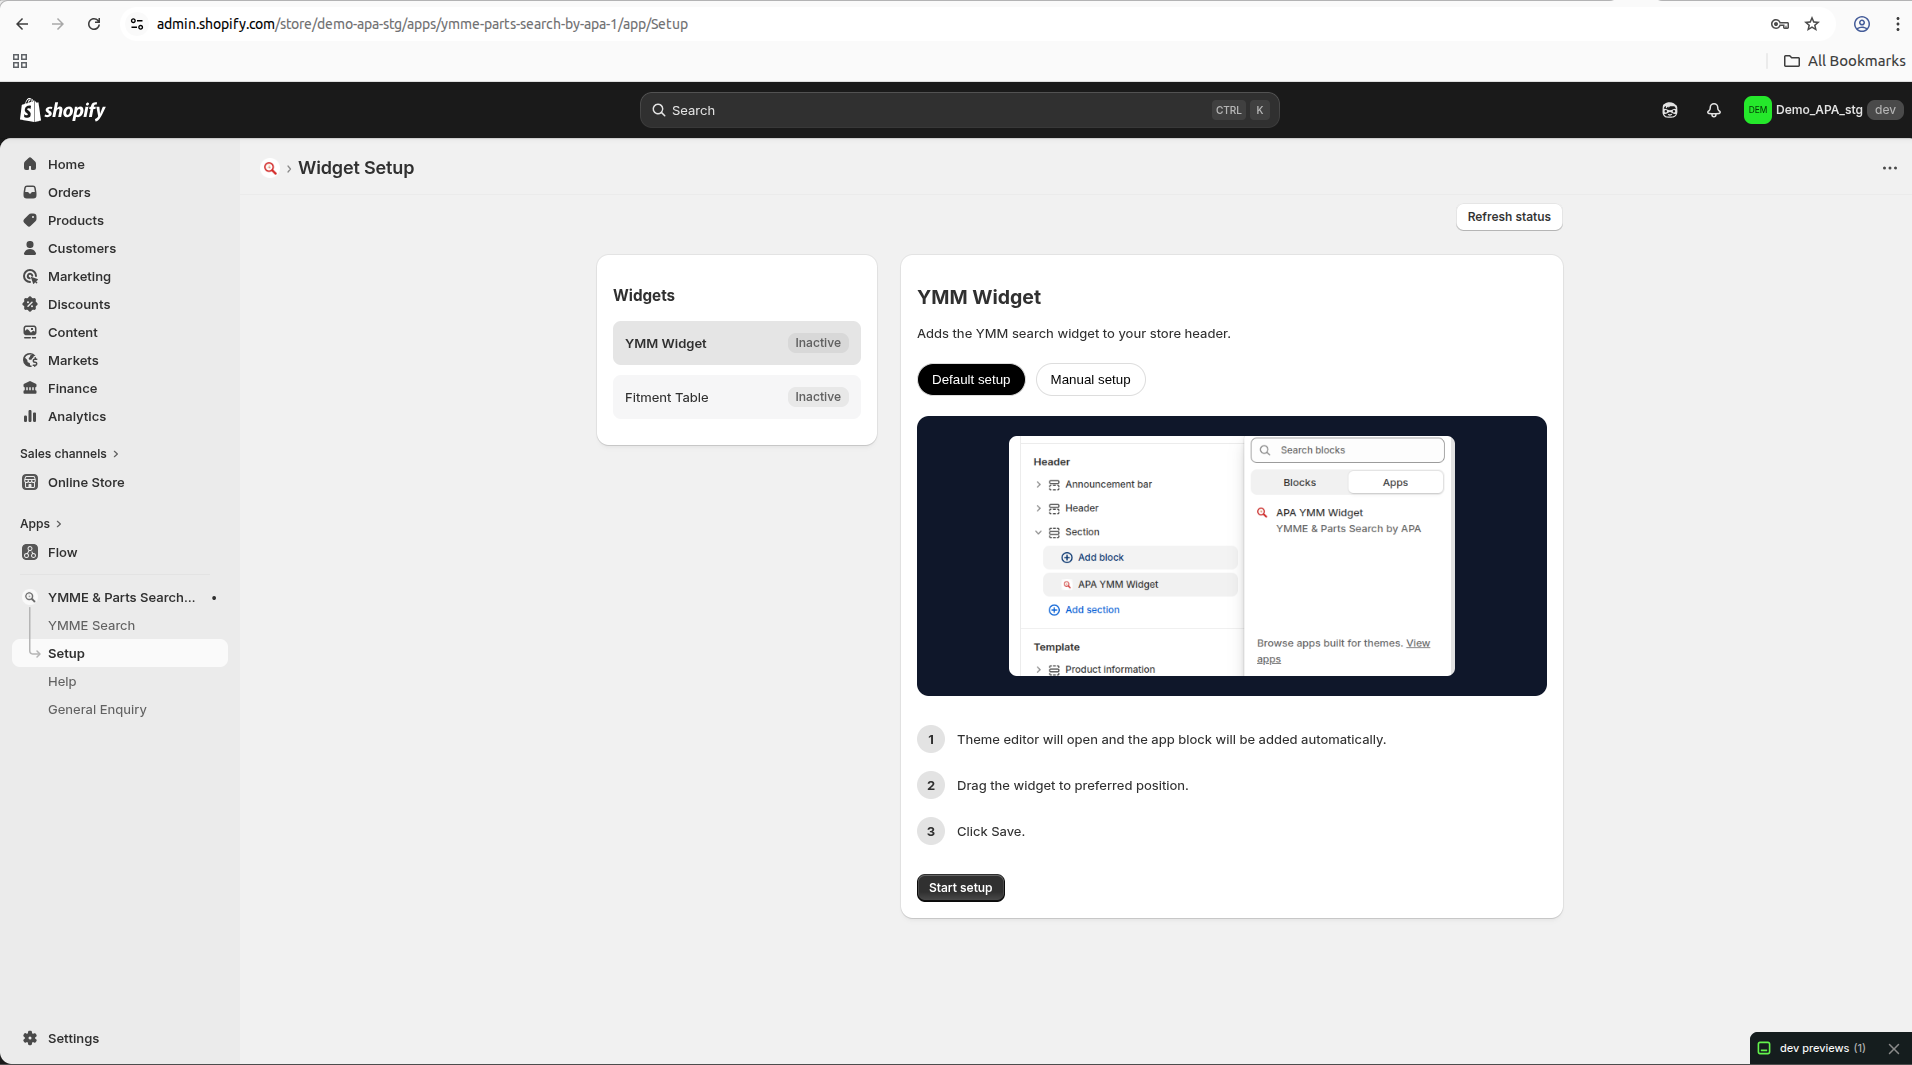
Click "Start Setup" for the automated configuration.
The App Block is inserted directly into your theme's header.
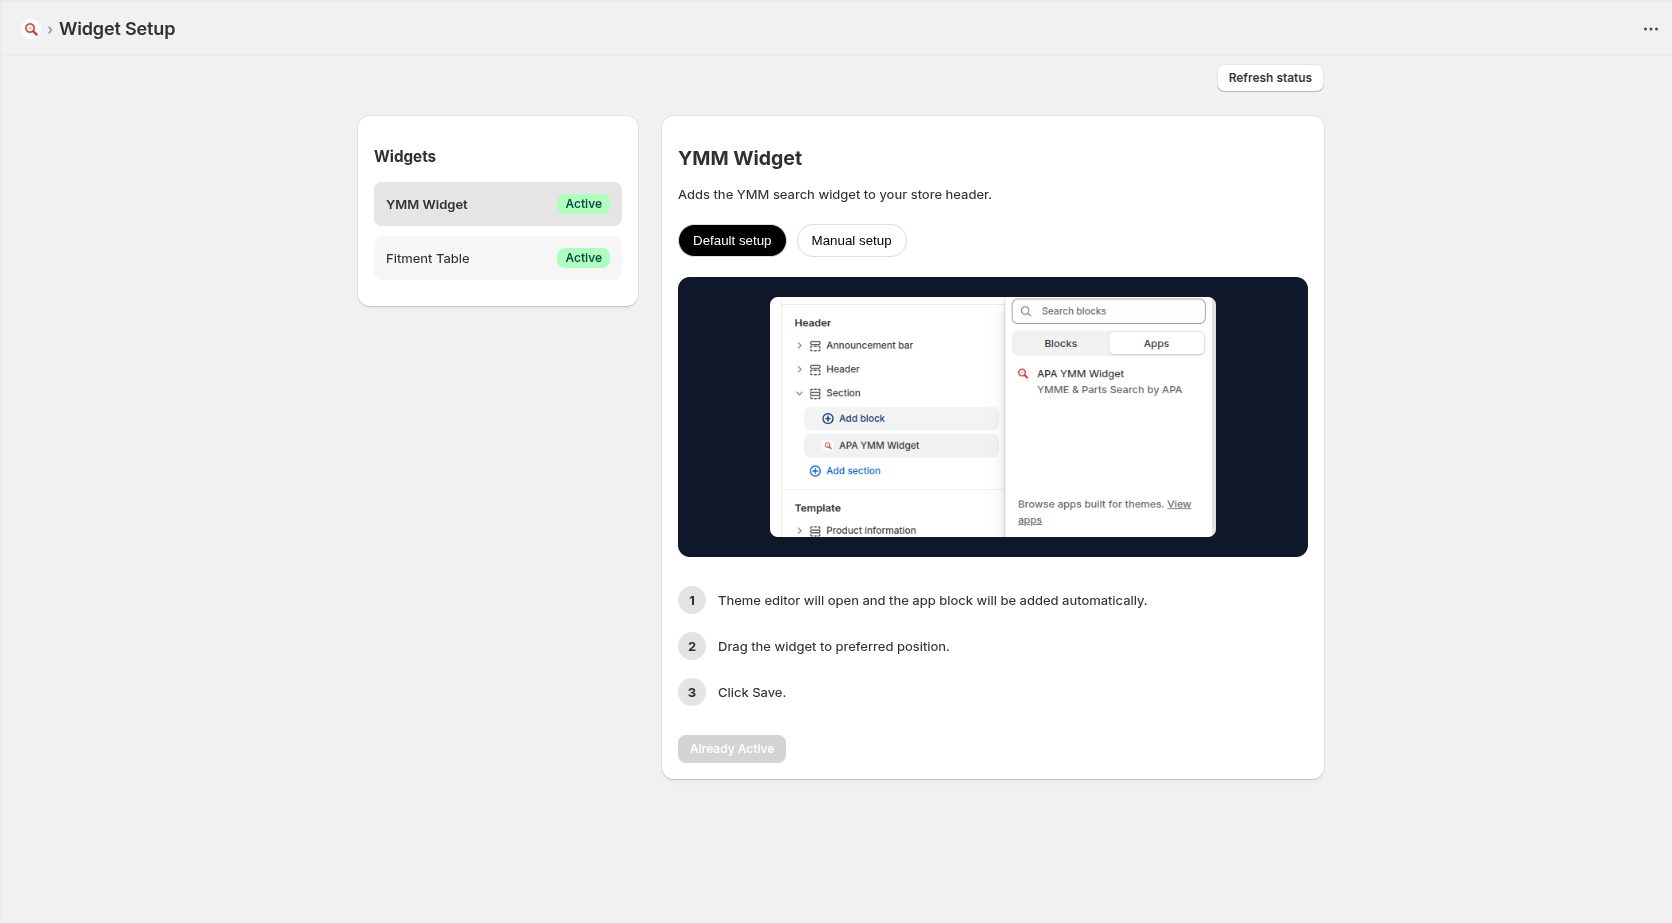
Success: The Year, Make, Model search widget will now appear in your store's header! Once activated, it will look like the dashboard below.
Option B: Manual Setup via Theme Customizer
- From your Shopify Admin, navigate to Online Store → Themes.
- Click the Customize button on your active theme.
- In the top dropdown, select your Home Template or Header section.
- On the left-hand sidebar, click Add Block (or Add Section).
- Switch to the "Apps" tab and select APA YMM Widget.
- Drag and drop the widget block to your preferred location in the layout.
- Click Save.
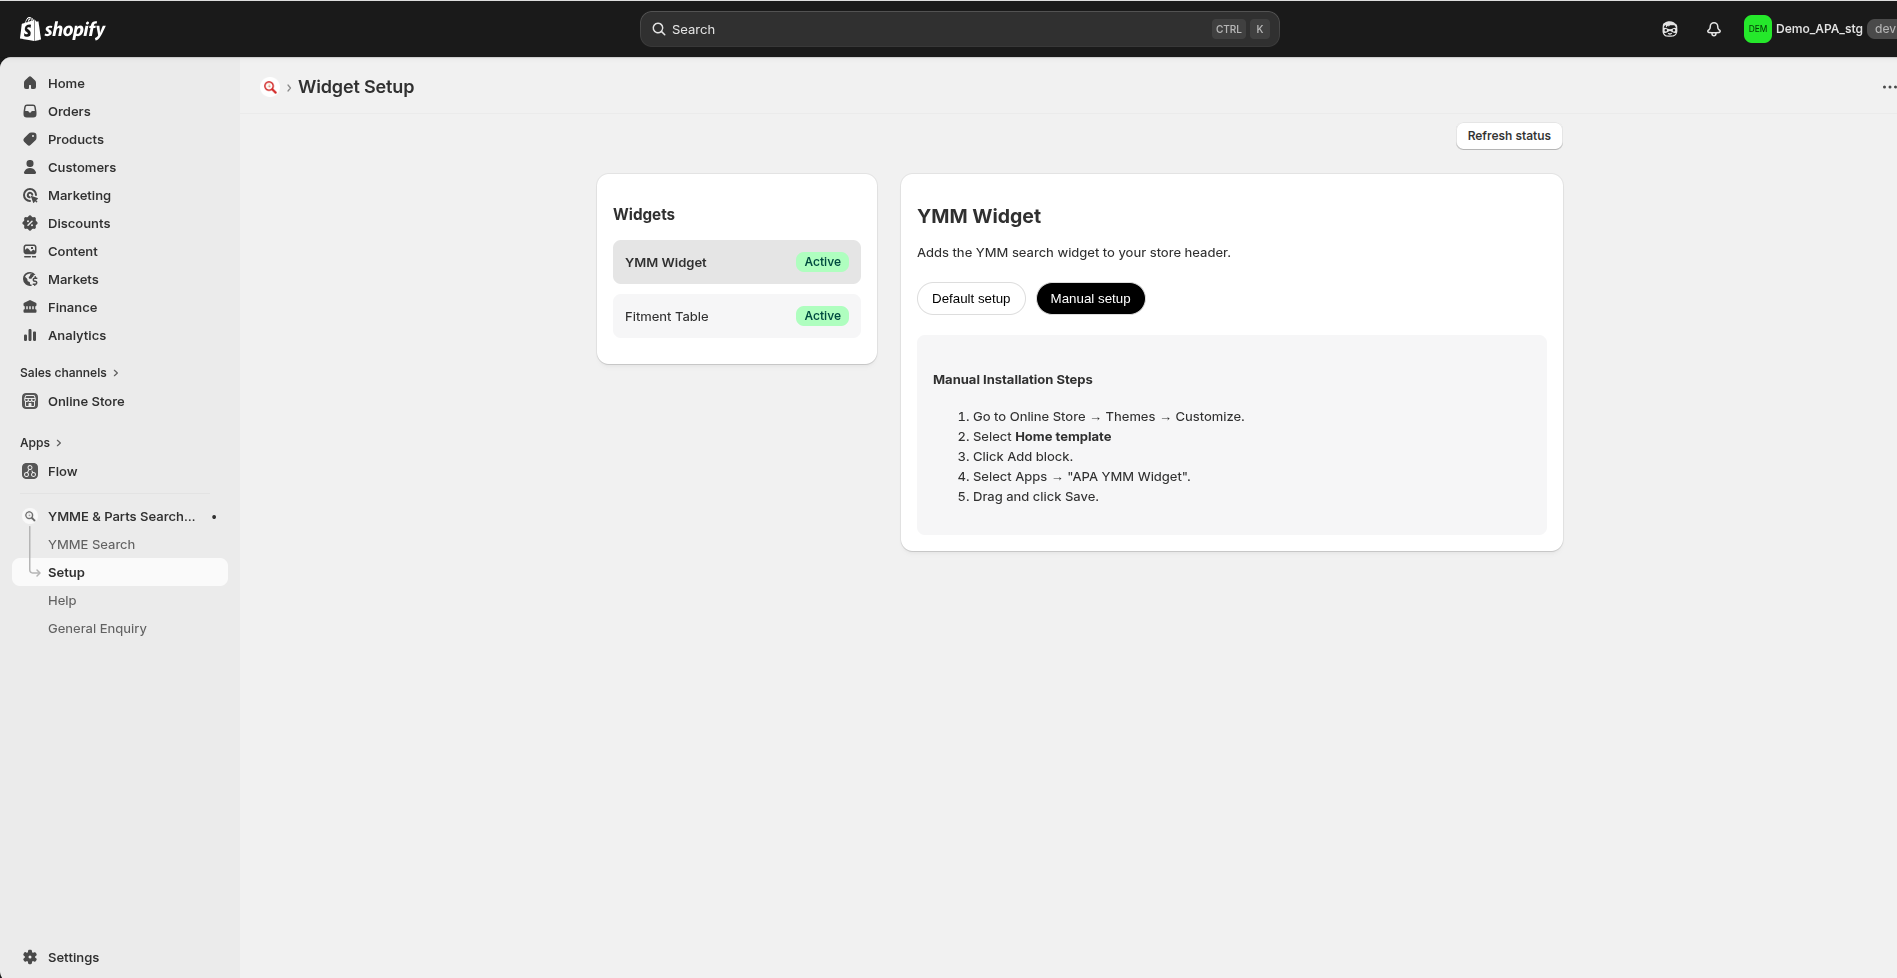
Drag the APA YMM Widget to your desired layout location.
2. Fitment Table Installation
The Fitment Table displays vehicle compatibility information directly on your Product Details Pages.
Option A: Default Automated Setup
- Go to Apps → APA YMME & Parts Search → Setup.
- Click on the Fitment Table card.
- Select Default Setup.
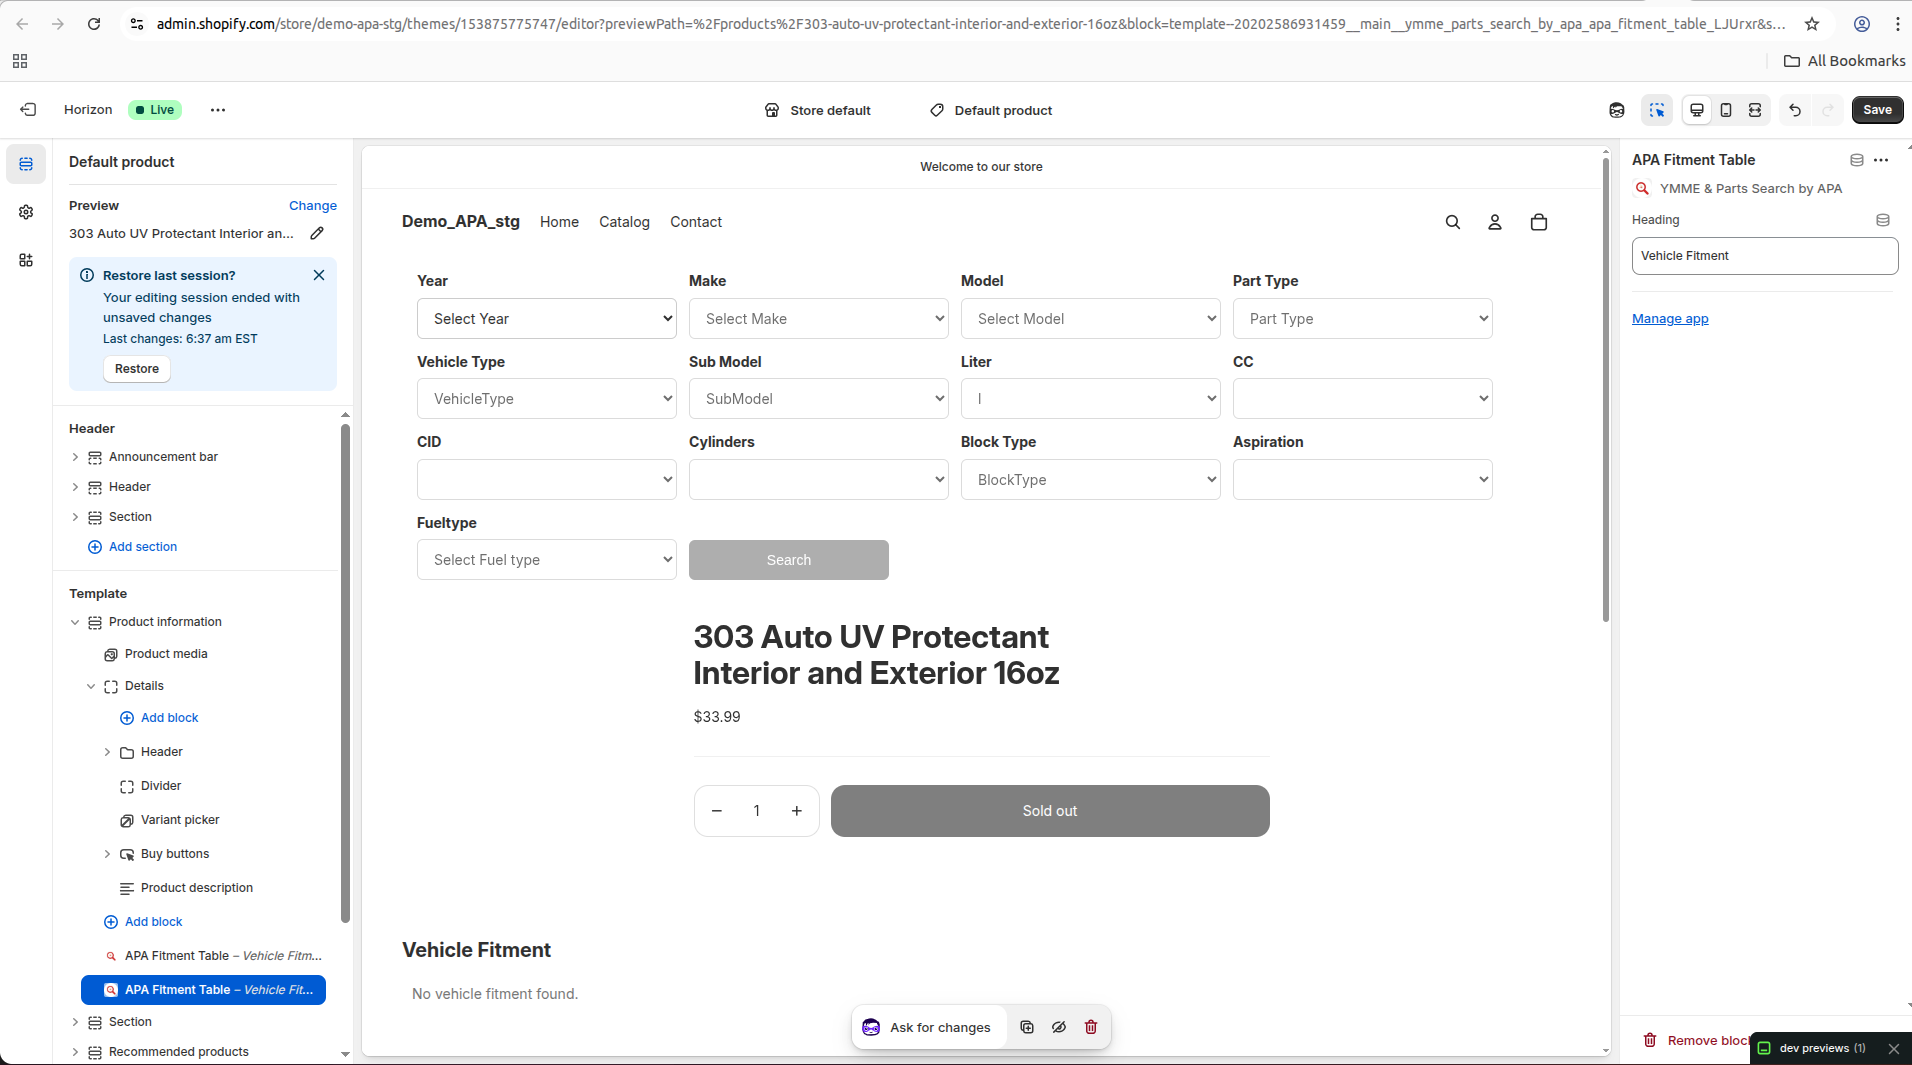
- The theme editor will open the Product Template automatically.
- The Fitment Table block will be injected into the Product Information area.
- Click Save.
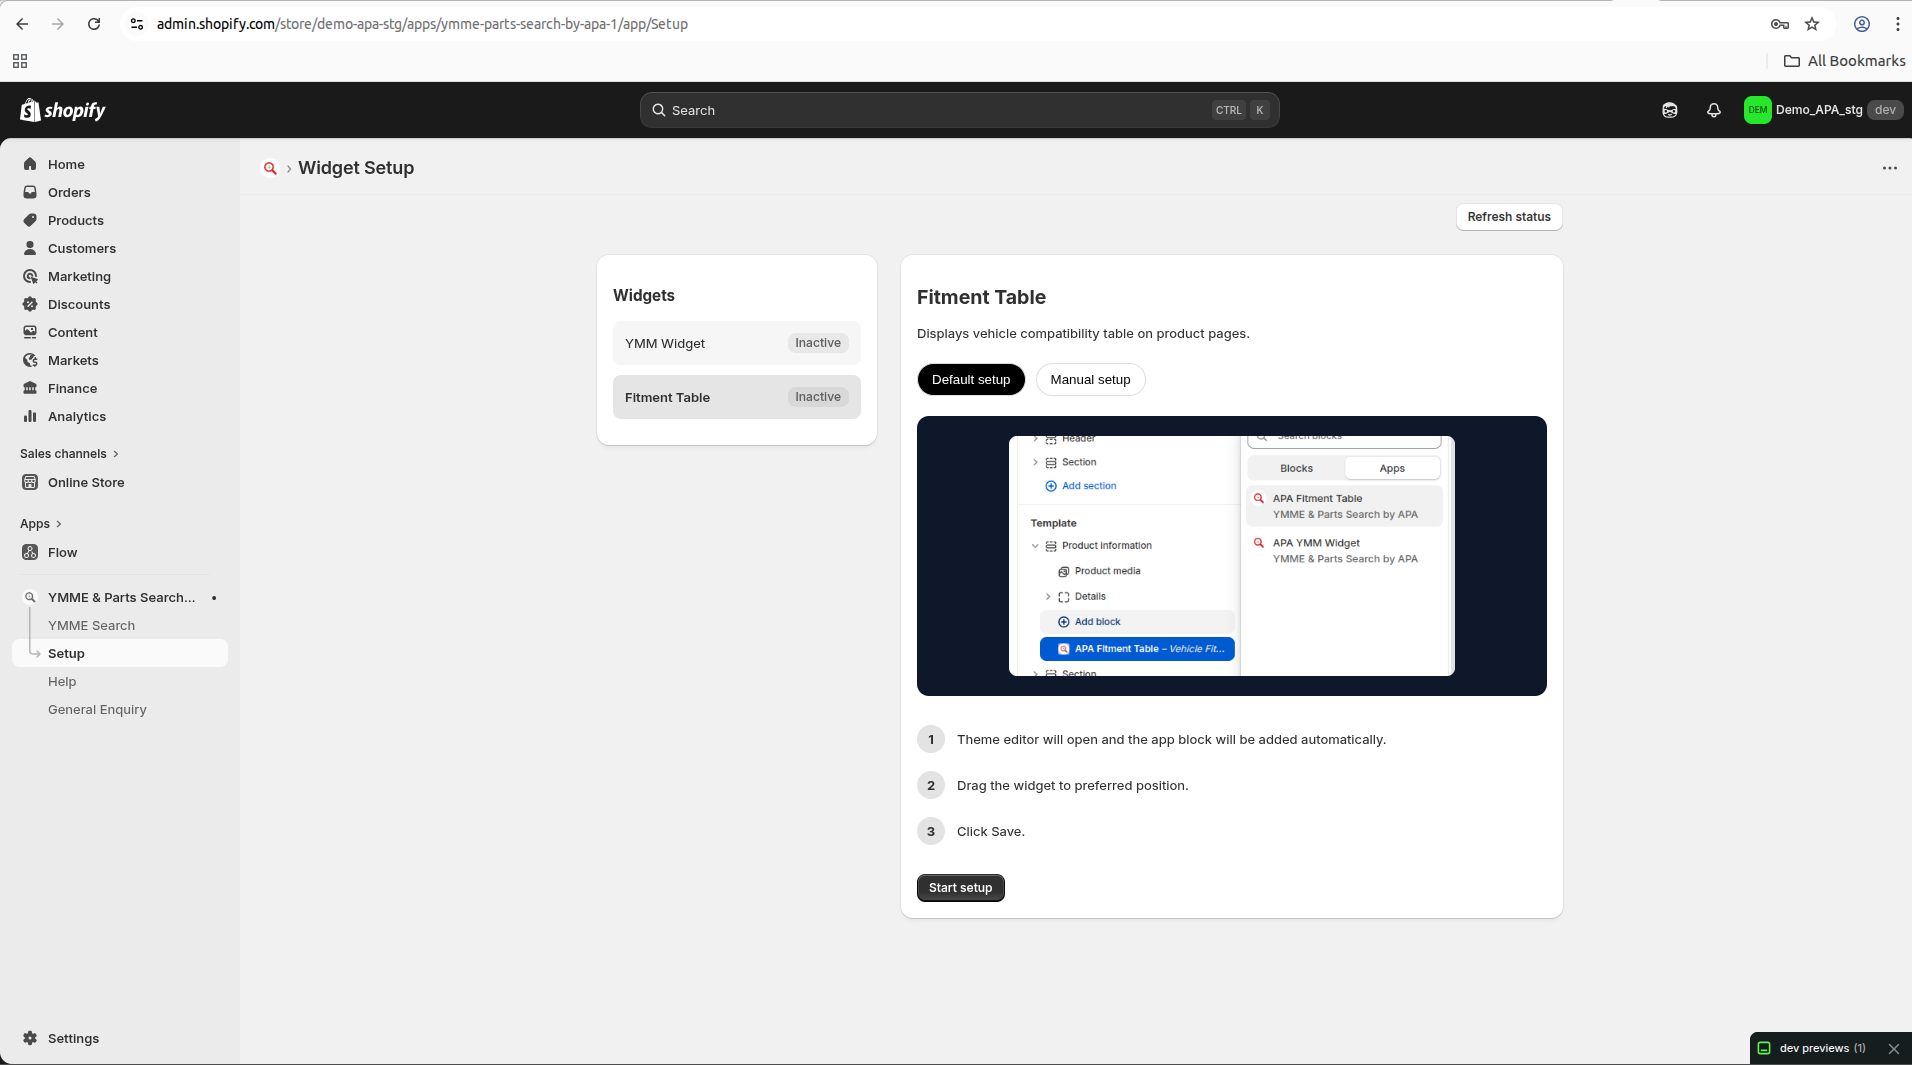
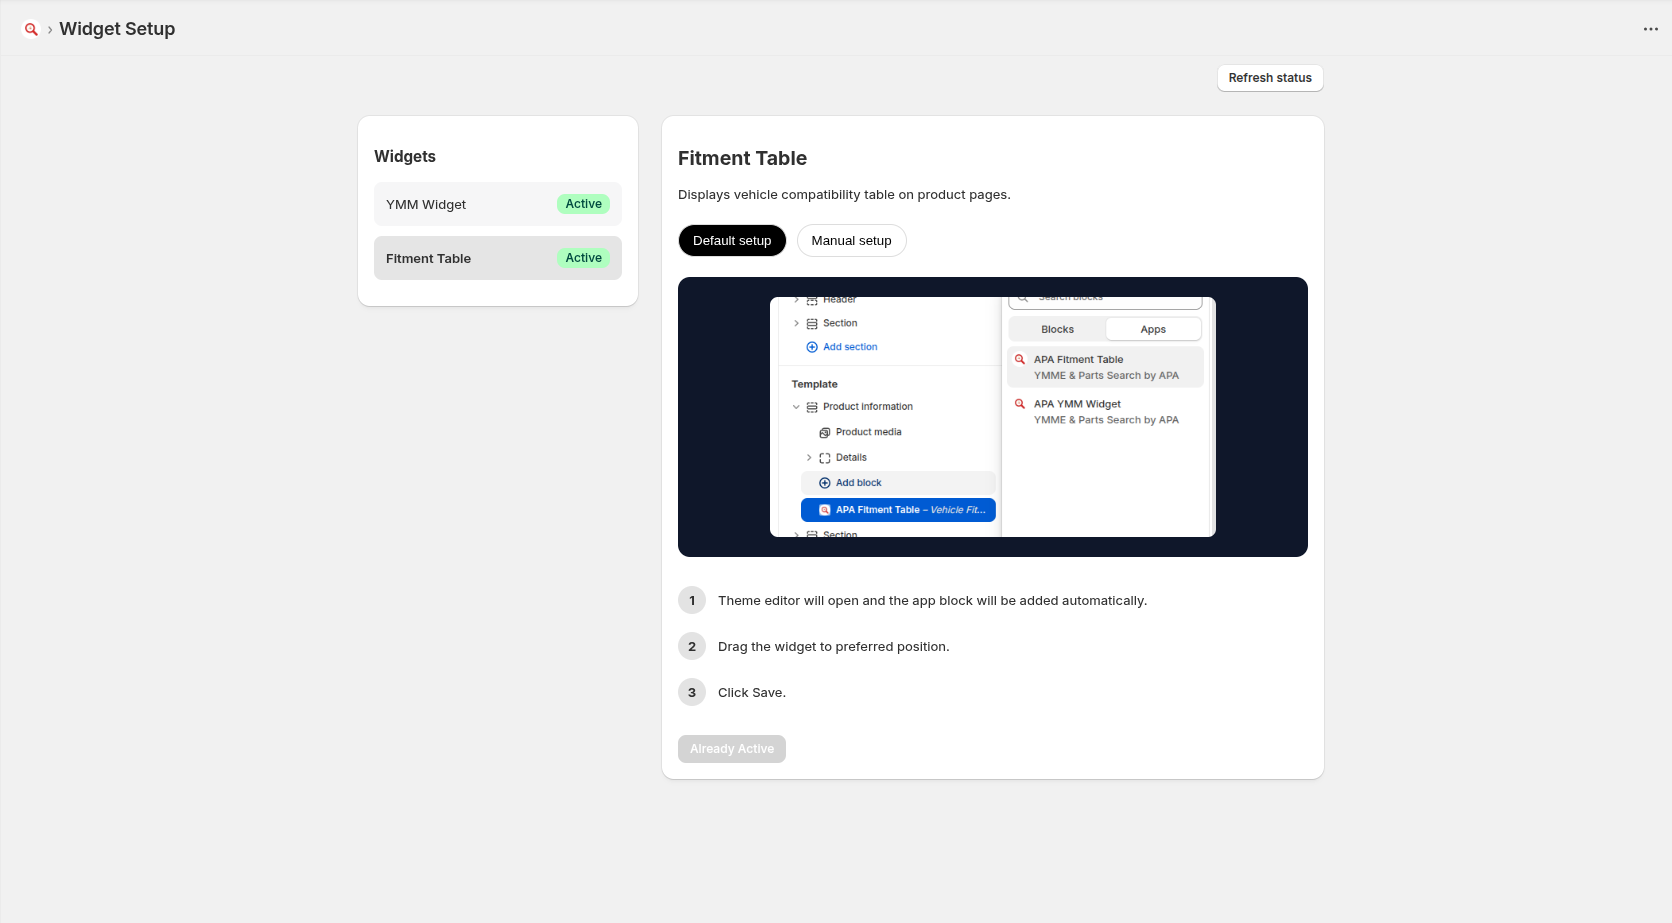
The Fitment Table is added to the Product Information block.
Success: The automated setup will then show as active in your app dashboard.
Option B: Manual Setup
- Navigate to Online Store → Themes → Customize.
- Use the top dropdown menu to select the Products → Default Product template.
- Under the "Product Information" column on the left, click Add Block.
- Select the APA Fitment Table block from the Apps list.
- Drag the block right below the product description or buy buttons.
- Click Save.
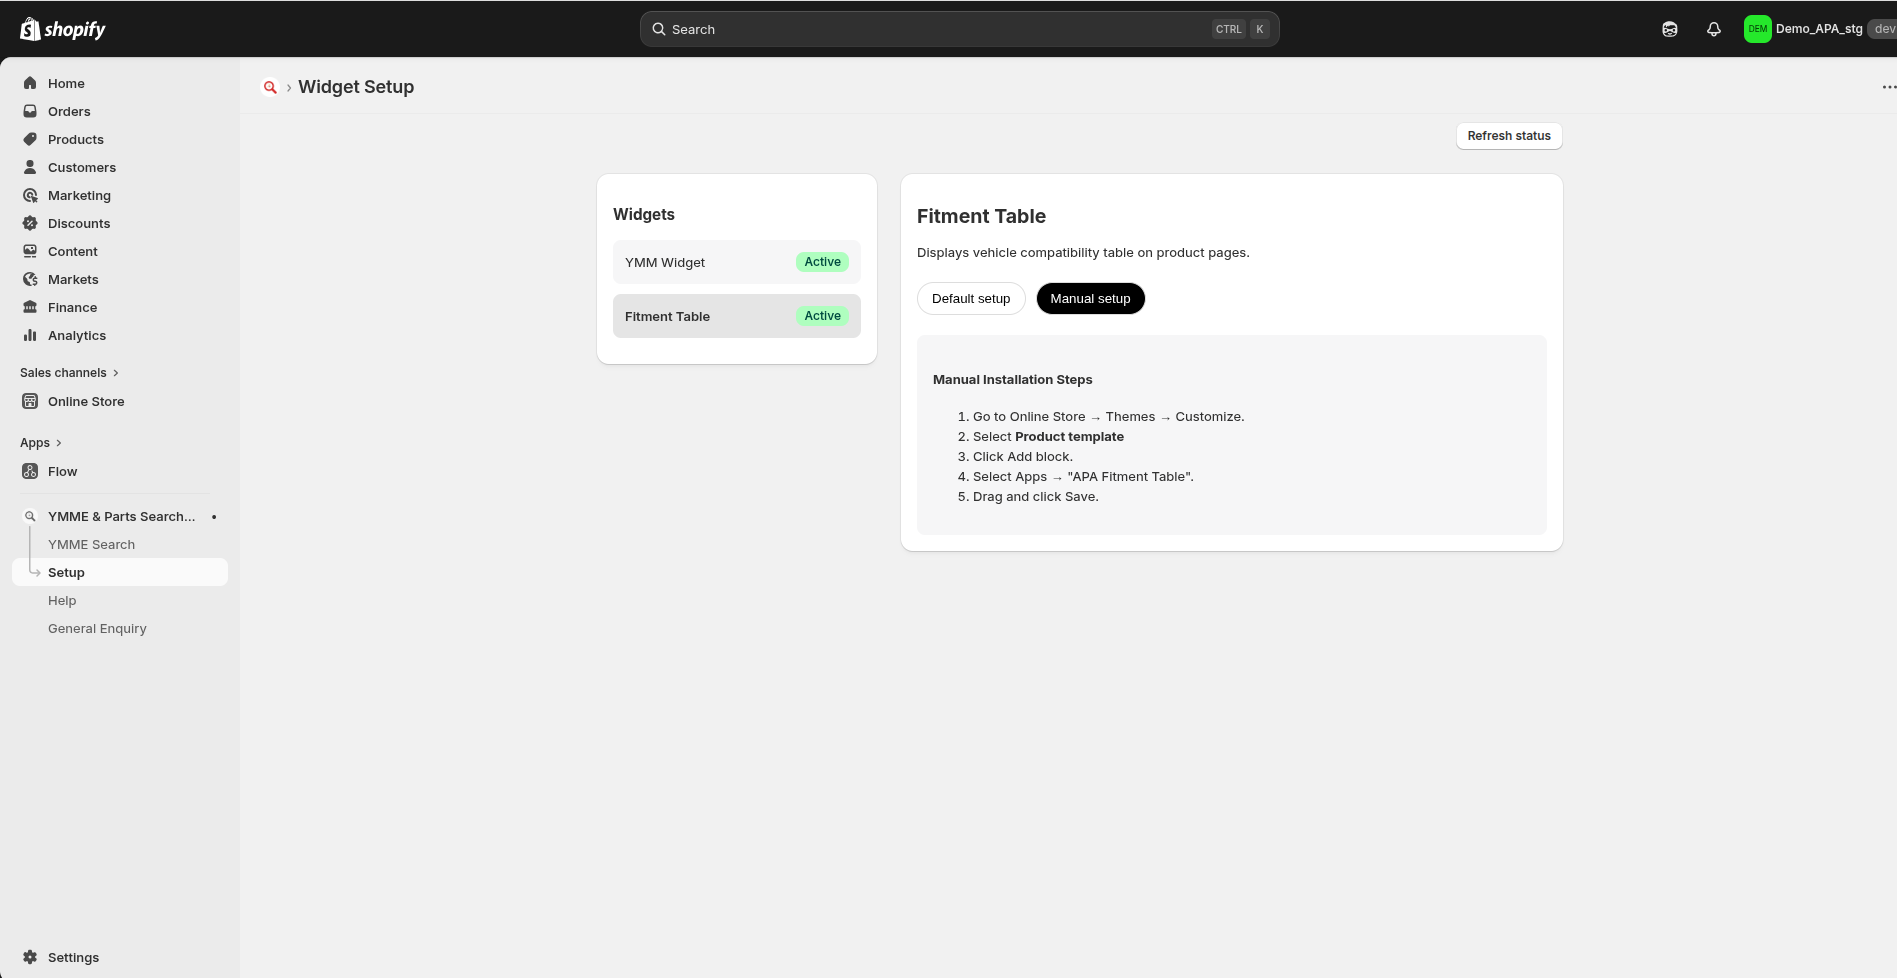
If completing manually, drag and drop the App Block into your template.

